⌘ The Stockholm RichText-Editor Lessons
- ← Markup plugins
- « The Stockholm RichText-Editor Lecture Lessons »
- Categories →
A preface about HTML and RichText Editors
HTML RichText editors are self-contained Javascript programs. They are as good as their creators and programmers intended and developed them to be at the current state.
Since they are "external" parts of programs, their structures are naturally generic and not always necessarily compatible with the needs of the framework in which they are used.
It is therefore generally advisable to acquire certain techniques and structures for the use of such RichText editors.
These editors translate their actions and formatting into HTML. HTML is a structured language. Therefore, it is imperative that over time you understand HTML at least in some basic way so that you can evaluate it.
Practice with some examples how the editor behaves under certain circumstances. So better start rather simple and then expand your exercises on time to more enriched examples like adding images etc.
Investigate what effects your actions have in "Source" mode. Therefore it is good to know that there are HTML tags that must always be closed (in most cases) and (rarely) others that can stand alone.
Example of the former is "bold text" (strong-tag). Example for the latter are simple "images" (img-tag).
It is also important to know that certain tags have a semantic meaning, i.e. predefined properties, and others do not. The p-tag that encloses a paragraph is an example of the former, the classic and frequently used div-tag an example of the latter.
What does semantic mean in this case? It means that semantic tags have visible consequences for structuring and display, while non-semantic ones have meaning (only) for internal use and structure, so to speak.
Finally, it is important to know that tags are always in a way containers in which structured further containers can be found, like a box with further storage boxes inside. If you accidentally remove a wall of one of these inner boxes, its contents will leak out and possibly damage the whole package container.
HTML RichText editors have internal guards that try to minimize such consequences. However, these only repair and may not always do what the application and the user actually want to achieve.
So Serendipity Styx has certain conditions, e.g. for the input of structured image containers, and which must be kept, but of which such an "externally" developed program like a RichText Editor can know nothing or little.
So the techniques to be learned refer to two conditions. The first one is the conditions and specifications of the framework and the other one is the behavior of the RichText editors.
The div-tag element already mentioned is a generic block element in HTML without a fixed meaning and is therefore used in principle whenever one wants to achieve a structured container that gets the desired properties from its inner elements, and/or is additionally "styled" with the page description language CSS.
The repair measures of a RichText editor are naturally fond of such DIV-tags and nest the damaged or not valid structures rather more than less.
Stockholm Lecture Lessons I.
The first of this lesson is to do something very simple. Start a new entry post as you always do. Work like advised but don't save that or these posts at the end.
So this is just a simple lesson lecture:
Write some text so the view breaks the line itself. For this just copy the example "lorem ipsum" text which is long enough to play with.
You know how to mark and copy text. But do you know how to paste it?
It is "[Apple command key] + [v]" (https://support.apple.com/en-us/HT209651), or [Ctrl] + [v] everywhere else.
Example Text for copy: ¹
Lorem ipsum dolor sit amet, consectetur adipiscing elit. Maecenas luctus nisi sit amet turpis placerat lacinia sit amet at lacus. Cras nec porta nisi. Aliquam lobortis nisi eget turpis blandit rhoncus. Cras placerat accumsan lacus, tristique pellentesque tortor condimentum ut. In hac habitasse platea dictumst. Integer fermentum, velit a vehicula porttitor, leo nunc imperdiet est, vitae imperdiet ipsum velit a sapien. Nulla quis justo in magna porttitor sodales eu non sapien. Sed consequat lectus diam, vehicula dictum nulla. Sed rutrum mollis enim, in posuere tortor congue sed. Duis ante arcu, bibendum sit amet eleifend ac, molestie eget elit. Integer risus lacus, dapibus ut commodo eu, laoreet at odio. Curabitur varius, urna ac tincidunt gravida, eros dui consectetur nunc, euismod consequat turpis urna non libero.(¹) PLEASE NOTE: When you copy text from HTML pages like this page, it has the disadvantage that you also copy the inner belonging HTML tags. When you have a plain text editor and you there paste the selected text, no tags are shown. But in this case, pasting to a RichText Editor, the HTML-tags are ported. For this special lecture case we do not want this behaviour. For luck there is another keyboard command available to paste text without belonging HTML-tags. This is the keyboard shortcut [Shift] + [Command-Option] + [v]. With this command you can paste the text that you want with the original formatting stripped out.
Paste the copied text to your new entry.
Click on the blog editors "Source" button and view the result.
It should look like this:
Dismiss this entry and start a new one. NOTICE: Up from Styx 5.0 with the changed RichText Editor you can write straight away and the text will be automatically paragraph’ed. Jump into lesson lecture two.
Before you now add the text. Place your cursor where text would start at the beginning and hit the ENTER return key of your keyboard. You see that your editors line jumps down to a next position. Now, just use the BACKSPACE (delete) button of your keyboard, so the cursor jumps back to the first (starting position) line. As simple as that. This announces to the editor that you want to start with a paragraph.
Paste in the Text (again without formatting) and hit the editors "Source" button in follow. You can now see that your text is surrounded by p tags.

This is the recommended way how you should start your entries with text.
- End of lesson lecture one -
Our next lessons will be more advanced. "Writing an entry with more textblocks" and "Writing an entry with more textblocks and some images."
But first try this first lecture. Do it some more times to get used to it.
After you have learned about these behaviour(s), have a view on some of your last or future added entries, how they look alike when you hit the Source-view button.
Notice how clean this should look. Just don't do nothing else than looking around and get a feeling about what I mean, when I say: "keep text and images blocks clean and separated".
- Using the RETURN-key ("ENTER") - and in startup cases followed by the BACKSPACE-key - enables text to live inside
pparagraph container blocks. - In every case you need to re-style your written text content, place the cursor at some text or text sentence start, then simply use key RETURN to style that text part to a new
p, even if you haven't cared about it right in the beginning.
Stockholm Lecture Lessons II.
This example lecture II. assumes that you want to enter a blog text that is enriched with additional images. The images to use you have already uploaded to Serendipity Styx and you do know that now always additional to the actually uploaded image a smaller preview (thumb) version of the image exists.
With these two image occurrences alone, various (image) container nests are possible, be it via hyperlinks, or only as a pure image display, as an additional image comment, by further placements on the page, or further image properties, and/or as a (recommended) "media container" with further image variations of the same. (a.s.on)
The following example that gave rise to this documentation is based on a very simple case.
This case is, that you want to display the image always (standalone) in the center and therefore separated from the text as a full-size image, so that your blog entry consists only of text blocks (paragraphs) and images. Simplified as a scheme:
- - - - - - - - - - - - - - - - - - - - -
| Text container block |
- - - - - - - - - - - - - - - - - - - - -
- - - - - - - - - - - - - - - - - - - - -
| Image container block |
- - - - - - - - - - - - - - - - - - - - -
- - - - - - - - - - - - - - - - - - - - -
| Text container block |
- - - - - - - - - - - - - - - - - - - - -
Here to show an example preview entry of this lecture II.
Lorem ipsum dolor sit amet, consectetur adipiscing elit. Maecenas luctus nisi sit amet turpis placerat lacinia sit amet at lacus. Cras nec porta nisi. Aliquam lobortis nisi eget turpis blandit rhoncus. Cras placerat accumsan lacus, tristique pellentesque tortor condimentum ut. In hac habitasse platea dictumst. Integer fermentum, velit a vehicula porttitor, leo nunc imperdiet est, vitae imperdiet ipsum velit a sapien. Nulla quis justo in magna porttitor sodales eu non sapien. Sed consequat lectus diam, vehicula dictum nulla. Sed rutrum mollis enim, in posuere tortor congue sed. Duis ante arcu, bibendum sit amet eleifend ac, molestie eget elit. Integer risus lacus, dapibus ut commodo eu, laoreet at odio. Curabitur varius, urna ac tincidunt gravida, eros dui consectetur nunc, euismod consequat turpis urna non libero.


("Images, courtesy of CC licensing https://creativecommons.org/licenses/")
Lorem ipsum dolor sit amet, consectetur adipiscing elit. Maecenas luctus nisi sit amet turpis placerat lacinia sit amet at lacus. Cras nec porta nisi. Aliquam lobortis nisi eget turpis blandit rhoncus. Cras placerat accumsan lacus, tristique pellentesque tortor condimentum ut. In hac habitasse platea dictumst. Integer fermentum, velit a vehicula porttitor, leo nunc imperdiet est, vitae imperdiet ipsum velit a sapien. Nulla quis justo in magna porttitor sodales eu non sapien. Sed consequat lectus diam, vehicula dictum nulla. Sed rutrum mollis enim, in posuere tortor congue sed. Duis ante arcu, bibendum sit amet eleifend ac, molestie eget elit. Integer risus lacus, dapibus ut commodo eu, laoreet at odio. Curabitur varius, urna ac tincidunt gravida, eros dui consectetur nunc, euismod consequat turpis urna non libero.
HOWTO guide for some lecture learning techniques:
There are several VALID ways to start a new blog entry.
- Place cursor in your body field and start writing your first text block - or -
- Place cursor in your body field and add an image (Recommended by using the ‘Picture Container’ submit).
Assuming you want to start with a paragraph’ed textblock, then add 5 images and want to end the entry with another paragraph’ed textblock.
- Write or add text block for first paragraph by [CTRL] + [v] ( or the Apple MAC equivalent [command] + [v] )
- Place cursor at text end.
Hit the keyboard RETURN-key ("ENTER").
Then select an image to the entry. - Scroll down and then hover the mouse over the inner bottom line of the image - a red magic line appears. Click the red line. (The Editor line jumps down.) ¹
Select a next image. - Scroll down to reach the bottom end of the last image and hover your mouse over the inner bottom of this image and the red magic downward line will appear.
Hit the red magic line (and the Editor line jumps down). ²
Select another image. - Follow the rule for the fourth image to add
- Follow the rule for the fifth image to add
- Scroll down again and find the last image downward pointing red magic line.
Hit the red magic line (and the Editor line jumps down). ³
Insert text for paragraph. (BTW, no additional space or line breaks after that - otherwise delete them with your keyboards BACKSPACE key)
(¹′²′³) Do not use keyboard actions here while learning how to find and use the red magic line.
For the advanced users there are two keyboard helper commands available which do the same.
You will notice, that once you have given a red magic (top or bottom) container “jumpout” to an image - the red magic line appearence stops for this image in this direction, because there now is a prepared space box available to add a new container which is easier to point to by mouse or keyboard.
Now you can either view the HTML source code by the [ Source ] button or view the entries lookalike by the Serendipity "preview" button, next to the "Save" button.
All good? Save the entry! Or try again to learn this behaviour more and better and start over.
The magical red line is something essential to have when you work with this RichText-Editor.
It always appears (or is available), when you are inside a somehow nested element block of the (inner) HTML source and you need to get out of this element block to start a new (nested or not) item block. Each item, like an image or a text block, is a (nested or not) HTML-block. It does not matter how long or short the value is. So this appears valid for a short image comment too, as long you are inside the RichText Editor. (This being said because you can give text comments to images too while ordering the image itself. You might have noticed before. But we come back to this in later lessons.)
As told, paragraphed text blocks, or blockquoted text, or listed text don't use the red magic line but essentially are HTML containers too. You can end the container by a simple ENTER keyboard command in the first and a double ENTER command for the two latters.
Another variant:
Assuming you want to start with an image.
- Place cursor into the (empty) body field and select the image of choice. It appears.
- Now hover with your mouse cursor and watch the red magic line appearance inside image end bottom line. To close this first image container block and run another image block container, hit the red line (and your editors line jumps down again).
- Order and select another image.
- Follow this rule of using the downward red line at inner image bottom to jump out the current container. Then you can either add another image or start writing a auto-paragraphed text.
- At this point, if you now want to write some text in another paragraph for example, just use your keyboards ENTER key.
- You now know that text blocks don't have any red line helper behaviour. You can just always hit the RETURN-key ("ENTER") to end the current and start a new paragraphed text block or add an image, right away without any further (keyboard) actions.
- Sometimes it does happen that you want to change the entries start image and now actually do want to add a text paragraph before the top starting image. Hover over the inner top line of your image to make the upward-pointing red line helper appear. Do not use keyboard actions here. Use the upward pointing red line to jump out the container to add valid prepared space for a starting paragraph.
So this red magic line (on hover) is the magic line of happiness. It is your friend to write good and clean and unbroken HTML code !
Once you have settled your blog entries with containers in the way described in these two variants, or returning to an already posted blog entry, you will notice that each (image) container (and you will learn there will be some more), will provide a magic red line on hover to jump out. In this case for our first variant with the 5 images, after each single image container that has a next following image container. So not for the last, as it is followed by a text paragraph. Just watch out for them to appear when you re-edit a blog entry.
Paragraphed text containers are the gold Standard of writing structured text in the Internet of HTML. Using simple newlines per linebreak [Shift] + [ENTER], causing the single HTML br-tag are rare use cases.
Checking the written or added content by the RichText-Editors "Source" button will always quickly show you that you have worked the right way or not.
- Keep (inner) nested self belonging containers in one.
- Follow the magic red lights to get out containers.
- When not available, the BACKSPACE and RETURN keyboard keys are your friends.
- Don't blindly trust the RichText mode w/o re-checking the "Source".
- Keep "Source" view(s) clean, simple and separated.
The Stockholm Lecture Lesson III.
Good to know conclusions
There are cases where this EDITOR and YOU can get into conflicts. Assume you write text with images and then you notice that an image was not the one you really wanted to have - OR - it would better look when placed somewhere else - and so on.
First to say: As mentioned, it is good to have some knowledge how good HTML structure items look alike working together. For this and the case of repair you have the RichText-Editors "Source"-button. It always is much more easy and exact and the recommended way to cut and paste a (nested) image block from one place to another when you are inside the Source-View-mode. Doing this or even deleting image blocks within the RichText-Editor (preview) mode is very much Error-prone and HTML element leftovers will probably survive your action(s), which then might even destroy or leaving artifacts when you continue working or save the entry at this point.
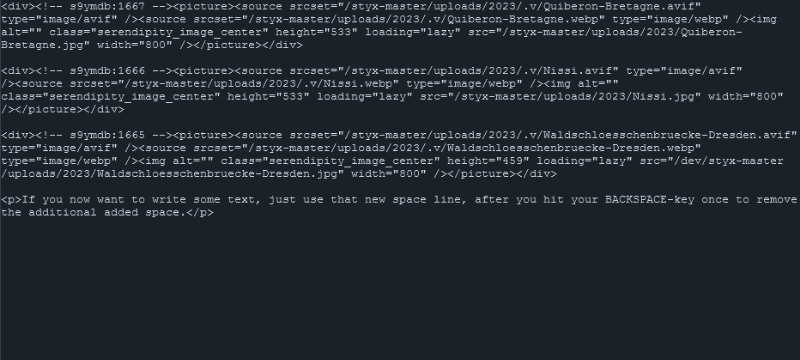
Example entry source:
<div><!-- s9ymdb:1242 --><picture><source srcset="/uploads/.v/rum.avif" type="image/avif" /><source srcset="/uploads/.v/rum.webp" type="image/webp" /><img alt="" class="serendipity_image_center" loading="lazy" src="/uploads/rum.jpg" style="width:1200px" /></picture></div>

<div><!-- s9ymdb:1241 --><picture><source srcset="/uploads/.v/durchblick.avif" type="image/avif" /><source srcset="/uploads/.v/durchblick.webp" type="image/webp" /><img alt="" class="serendipity_image_center" loading="lazy" src="/uploads/durchblick.jpg" style="width:1200px" /></picture></div>

<p>Its me. Your last added paragraph text block.</p>
As you can see it is much simpler to just mark and delete a complete image block<div><!-- s9ymdb:1242 --><picture><source srcset="/uploads/.v/rum.avif" type="image/avif" /><source srcset="/uploads/.v/rum.webp" type="image/webp" /><img alt="" class="serendipity_image_center" loading="lazy" src="/uploads/rum.jpg" style="width:1200px" /></picture></div>
than to do this in the Editors (WYSIWYG) RichText mode.
Doing the latter (if you get this managed ² ) can easily give something like the following strange "Source"-view result
<div><picture><img alt="" class="serendipity_image_center" loading="lazy" src="/uploads/durchblick.jpg" style="width:1200px" /></picture><!-- s9ymdb:1241 --></div>

<p>Its me. Your last added paragraph text block.</p>
As you can see all the benefits of using the recommended "Media Container" assumption including the image variations for avif (optional) and webp are gone. And the hidden s9ymdb:ID tag has moved. This is not the HTML source Serendipity Styx wants to save and give out since it breaks certain functions and behaviours !
It is not actually the fault of the RichText Editor, which is just doing what it was designed for, it is a matter of not knowing the needs and circumstances of the using framework (in this case Styx). Now, imagine you do this kind of actions certain times in one entry without checking the source code. This can very easy give even more strange code parts, multiple indents with div-tags and other blurrings.
Making it short: Delete or move block containers like this only via the "Source" view mode! Easy - Clean - and Straight forward ! ³
At this state it is good to know that this RichText-Editor has a "butler" (which previously was called "ACF"). This "butler" checks for (un-)valid code and then tries to repair it. These repairs don't always look like clean and straight HTML, but are at least valid, since unbroken. These automatic ACF (cleanup) actions always happen when you switch between the RichText-view-mode and the Source-view-mode and vice versa and when you save your entry.
Leaving the possible crumble by these (inter)-actions between you and the ACF as is, is no option ! Repairing it in the source, needs HTML structure knowledge ! This is why certain and here described techniques are mandatory to learn !! 😁 And, let me say it this way: Every human being is using techniques to achieve it goals... 🐒 💝
(²) Yeah, it is not that easy to remove the first example image in RT-mode. Even simpler would it be to mark and cut it, which would return a slight different "source" result. But also nothing we want to acquire. So, don't do it !
There is another way, which is using the magic red line on top of your blog entry (yes, here it can appear also). Hitting this top red magic lines "action button" places a new block above the first image. With this action you have "jumped" out thediv-ed image container block and your are now able to run the "DEL" (!) keyboard key. This deletes the first image container block, but leaves artifacts again. We have learned that we should avoid having those for current (and future) purposes. So don't do this either!
All you have to know and learn is to open the Source and delete the entire image block by hand. Simple and clean.
(³) Side Note: Having a strategy for your media item names will simplify things in case of delete or return. Imagine all your images are named by a long ident number string which is a mixture of the image timestamp and an identification number, or some geographic coordinates. And you now re-edit an entry in the Source-view, it is much easier to find the correct image container if you have a semantic naming policy, like "me_at_lake_superior.jpg" for example, than to know what "1253989351_1632_6274510601_n.jpg" is about. Think about it…!
You have learned that your RichText Editor is using the HTML element technique p for text paragraphs and div for other (nested) container blocks. So, if you find <p> </p> or <p></p>kind of source code parts in your current written blog entry, this is a paragraphed text block with or without one (as HTML entity) single space item (since you need at least one (to keep)) waiting for the users next input. Now you also know where this single space item comes from, that we previously remove(d) with our BACKSPACE key action.
There actually is no real need to have and leave empty (but interpreted) containers like this in your blog entries, specifically at the very end. If you do it, then only for extra needed linespace separators in very rare cased blog entries.
- The Source is your friend. Delete and move container items via "Source"-mode only.
- Watch out for your own habituation and awareness learning and using (these) techniques.
- Focus on the essence of your statement. What is the main message of your blog post? Is it text-based or image-based?
- To avoid too much restyling and possible rumbles, start with adding the main parts first.
Last Warning: The already mentioned different necessities of the framework (Styx) and the RichText-Editor themselves can open more problems in special for image related containers, like in case of linked (gallery) images or changing image properties, when using the double or right clicked internal forms of the editor in RichText mode. They look nice and compact and do what they were designed for generically, but actually, when changing properties and being saved, change or destroy Serendipity Styx (structure) needs. So just keep off, or play and know what happens. Recommended for usage are Styx framework forms and property entry points only. Once dropped into the RichText Editor, the recommendation for further "belonging" changes is in "Source"-mode only, as having said before.
Well, there isn't actually very much left to explain.
We have blockquote containers to cite some other people words, or place code examples via the codesnippet editor form button. Both containers provide their own cursor/ENTER technique to get out the belonging container. So once you have learned how the editor behaves, you know how to handle such new situations too. Both often more appear in comment entries, but are based on your blog topic.
There only is "advanced" image left/right placements left, floated by your text. Just try it with some entry examples and with our "lorem ipsum" container text which is long enough for studies. Some Styx versions brought improvements for this behaviour and still do. It/You should be able at last, to just place your cursor in some text where you would like the floated image to start-up and the Editor-parsed source HTML should automatically break your current text p block apart and insert a left/right floatet div image block in-between. Checking the behaviour view by the Styx entryforms PREVIEW button will give an example idea how this is going to show-up in real life, your frontend blog.
Additional notes to the red magic line and image gallery containers
If the entry content becomes larger than the editor window while writing and image container blocks such as galleries are inserted, a situation may arise where an active HIT-Area (for the Red Magic Line guide) of such a container prevents you from scrolling to the beginning or end of the content in the editor window (e.g., using the mouse wheel).
In such a case, you just need to wait briefly until the HIT area box deactivates on its own, and then you can scroll again as long as you don’t trigger a new HIT area box. This means the content focus is once again unrestricted and not limited to the box. With a little practice, even beginners can make better use of this behavior, although in rare cases you may still need to use the arrow keys on the keyboard or the scroll bar in the editor window.
ENJOY your studies! 😁